
Building a 312 Y Block for the Fairlane! (Part 2)
- Daniel Jessup
- Jan 12, 2022
- 9 min read
Updated: Apr 5, 2024

312 Y Block build of a 1957 Thunderbird owner who sold me a T85 transmission last year
Wow! If you only looked at the photo you would think I got quite a bit done since our last installment. But, I will have to admit that the beautiful engine in the picture is not mine. A gentleman in Wisconsin is doing very good work on a 312 and you can see that in addition to a roller timing set a brand new pair of Mummert aluminum heads and intake manifold sit on top of the block. This is sure to be one fast Y Block-powered Tbird! Jack, the owner, happened to have this 312 on an engine stand in the same garage where he sold me a T85-R11 overdrive transmission last year.


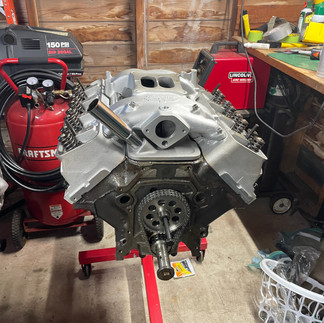


Yep, that 312 looks pretty good!
Even though I am waiting on the machine work for the rotating assembly to be completed, work in the shop continues. Before giving a few details about the direction in which we are headed I thought it best to update you with particular parts and acquisitions along the way. Restoring engines like these takes some patience and forethought. When one also considers the cost of Y Block parts these days then there is all the more reason to make wise preparations before pulling any triggers on purchases or making decisions on machining, etc.
Connecting Rods
Since our last installment a helpful Y Block drag racer offered a set of 7 C1TE connecting rods to be evaluated and used if needed. We shipped them off to Tim Mcmaster, owner and operator of Hanford Auto Supply, so that he could have look-see as he tackles all of the remaining machine work. I will have to make up the difference for the one outstanding rod but Tim assures me that he has a few extra in inventory. Why go with C1TE rods? These rods have the designation of "C" representing the 1960 decade (a "B" would represent the 1950's, etc) and of course a "1" for the year. So C1TE rods were first produced for the 1961 model year. Early Y Block rods for the 239, 256, 272, and 292 would have the letters "EBU" stamped on each one. The "ECZ" rods would be specifically for the 312. There is also a "C2AE" rod that was also a 292 Y Block rod (the set I was originally planning to use). The difference in most of this concerns the length. ECZ rods are a little shorter than the 292 and smaller engines because of the increased stroke from the 312 crank. The stronger C1TE rods were originally used on Ford's only forged crankshaft for the Y Block. These 292's were placed into the very heavy trucks and industrial equipment, but the rods are very close in length to the ECZ versions. Evidently, Ford's piston pin height on the C1AE blocks that came with those forged crankshafts was a little lower than normal 292 pistons. While I will not go into much more here in this blog post, you would be wise to read helpful information from John Mummert on his website. The page "Parts to Look For" will give you great advice on rods and quite a few other nuances of Y Block items.

This 57 Y Block has the best flowing exhaust manifolds, a "modern" carburetor and oil filter.
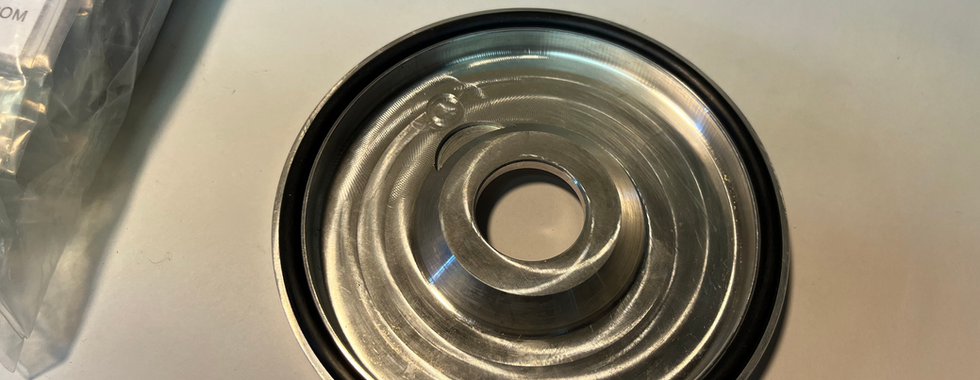
Crankshaft Dampener and Double-Row Pulley
It is always the details that make a difference, but we believe that especially to be true when it comes to engine work. There are quite a few pictures in the slideshows below, and yet there are still a good number of new parts I have not mentioned yet or do not have pictured. Let's start with the crankshaft dampener and double-row accessory pulley. With the exception of the very early Y Blocks and some industrial applications, Ford's first overhead valve engine always included a crankshaft pulley that had a rubber insulator between the outer and inner ring. Of course, this was designed to dampen vibrations from engine harmonics, etc. These engines are almost 60 years old and the rubber insulator on many a dampener is either deteriorated or just about to give way. There are good companies who will rebuild your dampener but I chose to go the brand new route with a company right here in the US of A. When I made my order I added a double-row accessory pulley just in case I wanted to add anything at a later date. The company is in McPherson, Kansas, and it is called Advanced Automotive Components, Inc. I will give you their eBay store for now as their website seems to be down at the time of this post.


Barker High Ratio Rocker Arms
A couple of years back I came across these little gems - "Hi-Lift Y Block Rocker Arms" - from a company named "B & B Automotive" in Glendale, California. You can tell the box and information have some age to them because there is no zip code listed anywhere. The rocker arms are NOS and are coated with that anti-rust cvosmilene from back in the day. I have new shafts, a set of good rocker arm stands, hardware, and of course adjusters for this set of rockers. The ratio is not documented but it is believed to be 1.54 or so. The plan is to run these on a set of ECZ-G heads and to have the rocker arm shaft fully pressurized.


Other Odds and Ends
I most probably will go through each of the parts separately at a later time, but pictured below are such items as a billet oil filter plate, stainless steel hardware kit, ARP oil pump drive shaft, NOS FoMoCo lifters, and more. We will give more on the Rollmaster timing set once I select my camshaft and I am able to take some video and more photos. I also have a Cloyes timing set that I purchased from John Mummert because I do plan to make some slight modifications to the 292 that is currently in the Club Sedan once I pull it out. I do have two different Iskenderian camshafts on the shelf. One is the E4 and the other is a 505-T for circle track racing. I do not think I will go with either of those for the 312, but I do plan to put the E-4 into the 292 at a later date. Engine sheet metal such as valve covers, timing cover, the E code valley pan, oil pan, etc will all be covered at a later date as well but most of that is ready to go. I do have to polish the Thunderbird aluminum valve covers though! I just purchased those from the gentleman who helped me with the C1TE connecting rods. (More on those valve covers in an upcoming post.)


Exhaust Manifolds or Headers?
If you are looking to develop power then there is no debate here and the answer is quite easy - headers are the way to go. Knowing that one of the purposes of building a 312 is to take me down the track a few ticks faster, I have been searching for off-the-shelf headers for the 1955 Ford Club Sedan. Headers are always interesting. While it is quite a simple job to bolt the flange of the header to your particular engine application (no clearance issues with that!), it can be a nightmare fitting up headers to your engine bay. Parts here and there seem to get in the way and the measurements are always as tight as they can be. I do have the best flowing exhaust manifolds - the 1957 version - but still these are basically an open log and not a 4-into-1 design to scavenge the exhaust gases as efficiently as possible. Now, if you own a Ford truck or a Thunderbird then you have several reasonably priced options from mild steel to stainless to ceramic coated. Both short and long tube headers are readily available and affordable.

The 1957 version of the exhaust manifold was Ford's best in performance.
However, if you have a 50s sedan then good luck to you! Thankfully there are two companies who offer headers off the shelf. One is a long tube and the other is a short tube. Rex HP up in Canada carries the short tube versions while Red's Headers carry the long tube type. The problem for me personally is cost. Once you figure in shipping, if you have them coated (neither are stainless), you are looking at roughly $1,000 for a set of headers to go into your 1955 Ford passenger car. Now, these are quality units and I hear nothing but good things about them. Here is the part that will make you realize how much more expensive running a Y Block can be when compared to other brands. Find out what a set of stainless steel headers to fit a small block Chevrolet for a 50's/60's automobile will cost you. Talk about the law of supply and demand!
A while back I heard tell of guys who have successfully modified a set of small block Chevrolet headers by whacking off the original flange, separating the middle two runners, massaging just a bit, and welding a Y Block flange to the pipes! Yowza! Call me crazy but I made a decision to give this a whirl. I thought to myself, "SBC headers are so cheap, why not try this out and see what you can come up with?"
The first purchase I made was a set of quality Y Block header flanges. You can see them pictured below in the SBC comparison of outlets and mounting holes. I ordered them from Speedway. Interesting thing here... Speedway says their flanges are 5/16" when in fact they are 3/8"! Nice bonus there, roughly $50 for the set of flanges and exhaust gaskets.


Next up was to find a set of headers for an SBC that might work. I purchased a set of stainless steel T-304 shorty headers that were indeed 4-into-1 with the collector, gaskets, and hardware. You can see this set here on eBay: SBC Exhaust Headers. Here is a photo of the driver's side (the most difficult side to fit).

This SBC header seemed to be the best of all that I researched.
I chose this header for a few reasons but the most important being that the backswept angle and spacing seemed to match the Y Block exhaust manifold in many respects. As you know, each of the ports on Ford's manifold sweep upwards, log out, and then exit to the rear at a very tight tolerance to the head and engine block. Looking above, the tube for cylinder #5 sweeps upward and goes back. The other tubes look like they would give clearance to other parts of the block and the engine bay itself. The pictures below also show an angle that will mandate a dramatic change for the position of the collector if we are to get enough clearance to attach a custom down pipe leading to the muffler. Take a look...


Will this idea work?
You can tell right off the bat that the SBC header has a deeper collector exit. (I really do not think this will be a problem from what I can tell in the car.) As you look straight down the flange where it mates to the engine head, you can also see that Ford's manifold stays extremely tight to the plane whereas the SBC header veers out a good 3 inches. How can this be resolved? 1. Cutting the flange off will take up an 1/2" or more because the tubes will have to be inserted into the Y Block flange for a secure weld. 2. I believe that this can be corrected/modified by removing more of the rear tubes (cylinders 6, 7, and 8) as you cut from the front to the rear. We will have to see and I will certainly keep you posted.
You may be wondering why I would spend the money on a brand new set of SBC headers and then just chop them up... Welp, when you hear what I have in this set you will understand. The company offered them to me cheaper than what they had them listed. I bought the set for roughly $108 as I recall (that included shipping to my door), but when the box arrived there was a large hole in it and hardware was missing. When I contacted the company to see if they could just send me the nuts and bolts I was missing, they told me that it would be easier to give me a discount. So off came another $19. If you are keeping track here I am less than $80 into the pair and will have a set of SBC flanges and gaskets to sell when I am done. I don't really know if I could have found a used set of stainless SBC headers with this design and all the trimmings at this price, really.
I had planned to include an article from Tim Mcmaster concerning how to install a rear main seal in a Y Block Ford engine, but we will save that one for later. Tim gave me permission to post it here so at some point you can expect it to go live in the future. Speaking of articles, I have had several e-mail's or phone calls a month concerning my "how-to" articles and requests to email files. I am happy to oblige but I wonder that if there is enough interest I may end up adding a page to the website that can be navigated quickly and easily (maybe a series of PDF's that could be dowloaded and printed as needed). Do let me know if you would be helped by such a page and I will certainly consider it if enough folks respond.

Typical afternoon at a service station in the 50's and 60's!
If you have not done so already please subscribe to the blog to receive email updates at this page: https://www.hotrodreverend.com/blog-subscribe. There are a good number of you who contact me each week looking for information I have already posted to the website blog pages. It would help if you were receiving notifications every time a new post went live. Do not forget to tell your friends and your buddies - visit HotRodReverend.com today and share the link!
The Hot Rod Reverend
aka Daniel Jessup
Comments